
You would need to download rusefi_bundle.zip - that's an archive which contains the .hex file you would program into the microcontroller and current TunerStudio project definition.
To upload the binary image into the microcontroller you will need to download & install STM32 ST-LINK utility. At this point you only need the mini-USB cable, this cable would be used both to power and to program the board.
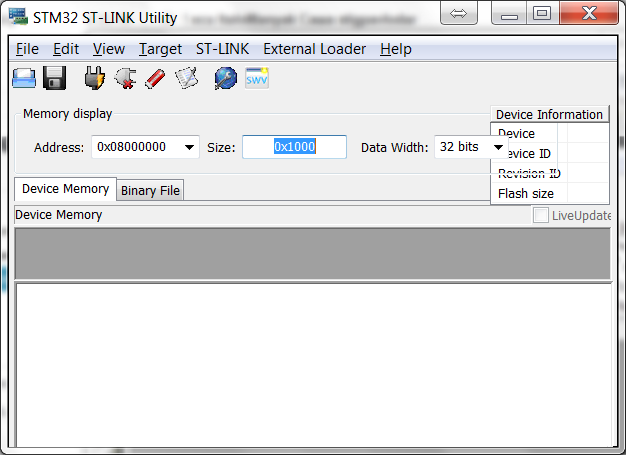
You should click 'Target'>'Program...', browse to the rusefi.hex you have downloaded and hit Start button like this

After you have programmed the chip, you should click 'Target'>'Disconnect' and hit the black button on the discovery STM32F407G-DISC1 board to reset the firmware. After you hit the reset button, you should expect all four LEDs to blink once and then you should see just the blue LED blinking.
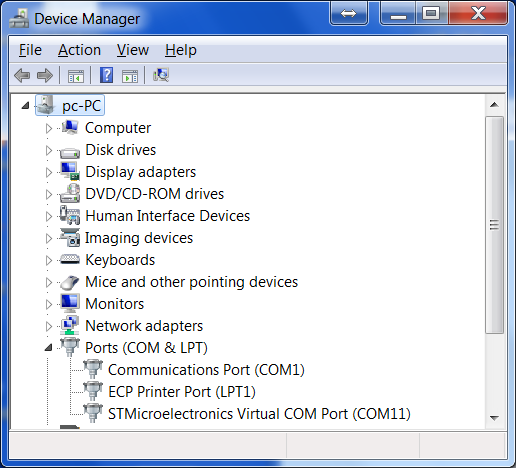
Now it's time to connect the micro USB cable. When you do this for the first time your Windows would prompt for drivers, you should download & install http://www.st.com/web/en/catalog/tools/PF257938
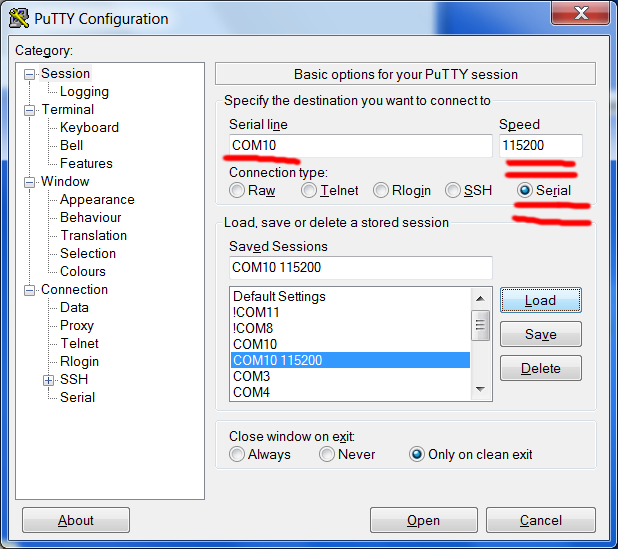
When the driver is installed & the board is connected via the micro USB cable, you can verify serial connectivity by opening your Device Manager - we are expecting to see a Virtual COM Port
At this point you are all set with the firmware and it's time to launch the dev console